The Anbox Cloud Appliance is not yet available from the Azure Marketplace. However, you can install the Anbox Cloud Appliance snap on an Azure machine.
The following instructions guide you through all relevant steps to deploy the Anbox Cloud Appliance on Azure. For additional information, see the Microsoft documentation about creating virtual machines in Azure.
The entire deployment process will take 20-30 minutes, depending on the selected hardware and the network conditions.
Check the prerequisites
Check the hardware requirements for the Anbox Cloud Appliance here.
In addition, make sure you have the following prerequisites:
- An Ubuntu SSO account. If you don’t have one yet, create it here.
- Your Ubuntu Pro token for an Ubuntu Pro subscription. If you don’t have one yet, speak to your Canonical representative. If you already have a valid Ubuntu Pro token, log in to Ubuntu Pro | Ubuntu to retrieve it.
Warning:
The Ubuntu Pro (Infra-only) token does NOT work and will result in a failed deployment. You need an Ubuntu Pro subscription.
- An Azure account that you use to create the virtual machine.
Create a virtual machine
Complete the following steps to create a virtual machine on which you can install the Anbox Cloud Appliance.
1. Deploy a Linux virtual machine
Log on to the Microsoft Azure Portal and select the Quickstart Center service.

In the Quickstart Center, select Deploy a virtual machine. On the resulting screen, select Create a Linux virtual machine.

2. Configure basic settings
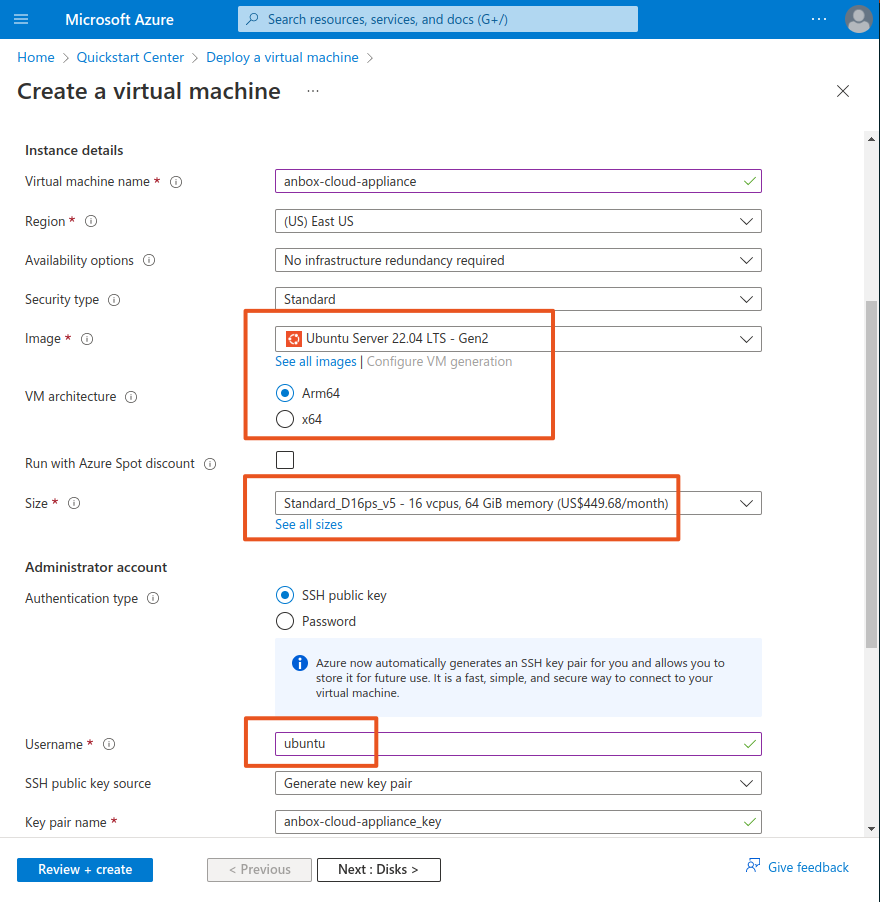
On the Basics tab of the virtual machine configuration, specify the required information. Several of the options are specific to how and where you want to deploy your virtual machine. In most cases you can keep the default values, but make sure to set the following configurations:
- Select the latest Ubuntu image (Ubuntu Server 22.04 LTS) for the architecture that you want to use. The following instructions and screenshots use the Arm64 architecture.
- Select a size that matches the hardware requirements. For example, select
Standard_D16ps_v5, which has 16 vCPUs and 64 GB of RAM. - Change the user name of the administrator account to
ubuntu. - Accept the defaults for the inbound port rules for now; these rules will be configured later in the setup process.
Click Next: Disks to continue to the next tab.
3. Configure disks
Azure separates the main disk for the operating system and any data disks. On the Disks tab of the virtual machine configuration, you can configure the OS disk and attach data disks.
For the Anbox Cloud Appliance, you should attach a separate data disk of at least 50 GB. To do so, click Create and attach a new disk. You can accept the default settings and change the disk size according to your requirements. For performance reasons, we recommend using 100 GB or more.

Click Next: Networking to continue to the next tab.
4. Configure networking
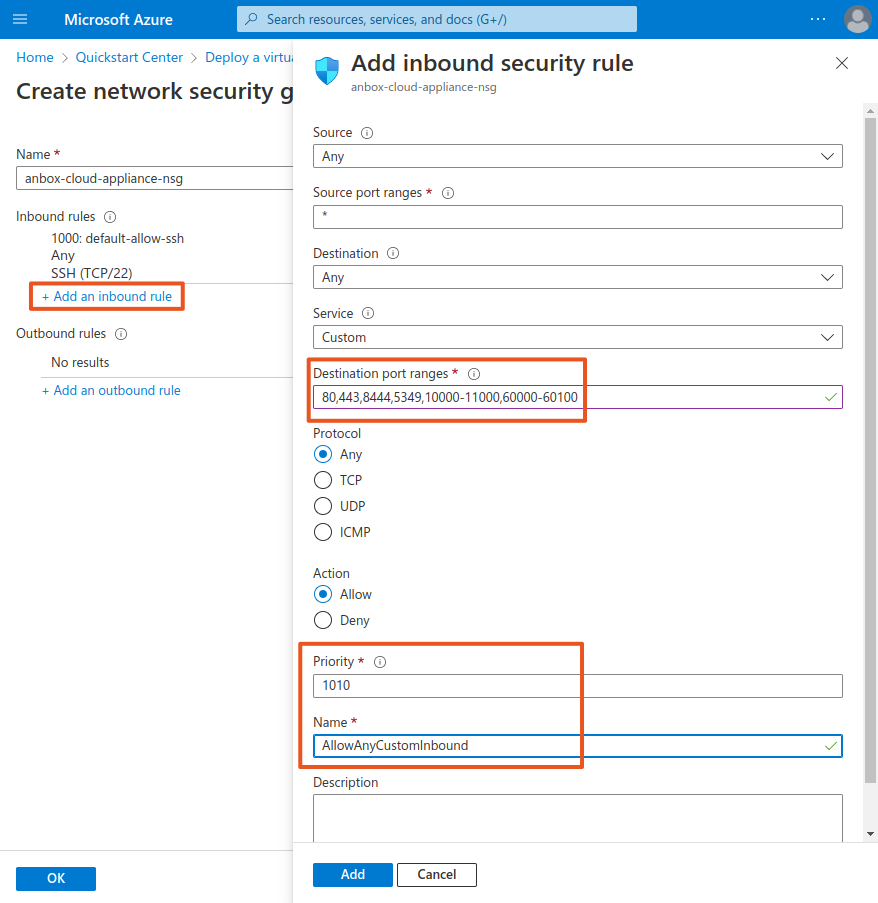
For networking, the Anbox Cloud Appliance requires the following change to the default settings:
- For the NIC network security group, select Advanced and create a network security group.
- Add an inbound security rule that allows access to the following destination port ranges:
80,443,8444,5349,10000-11000,60000-60100 - Change the name of the rule and, if relevant for your setup, adapt the priority of the rule.
5. Finalise the configuration
Check the configuration settings on the remaining tabs and make sure they are suitable for your deployment. The Anbox Cloud Appliance does not require any changes to the default configuration for these areas.
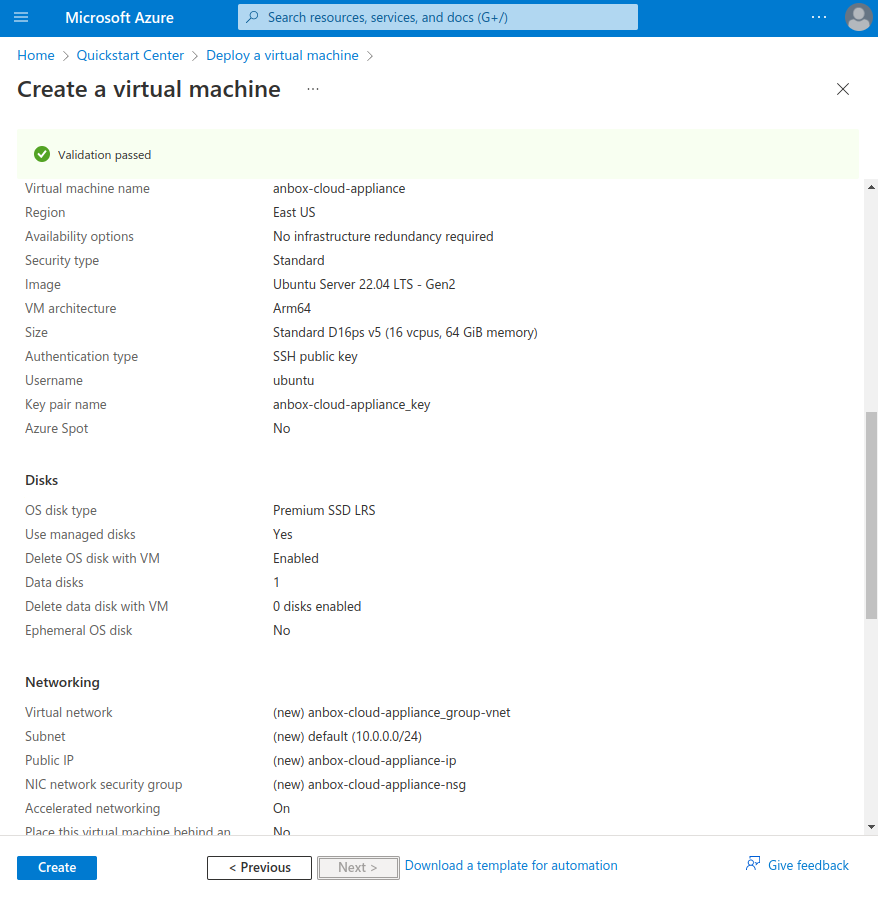
6. Review and create
On the Review + create tab, check the final configuration. If everything looks good, click Create to launch the virtual machine.
Azure will prompt you to download your private key before it starts creating the virtual machine. Make sure to save the private key in a secure location and with secure permissions (0600).
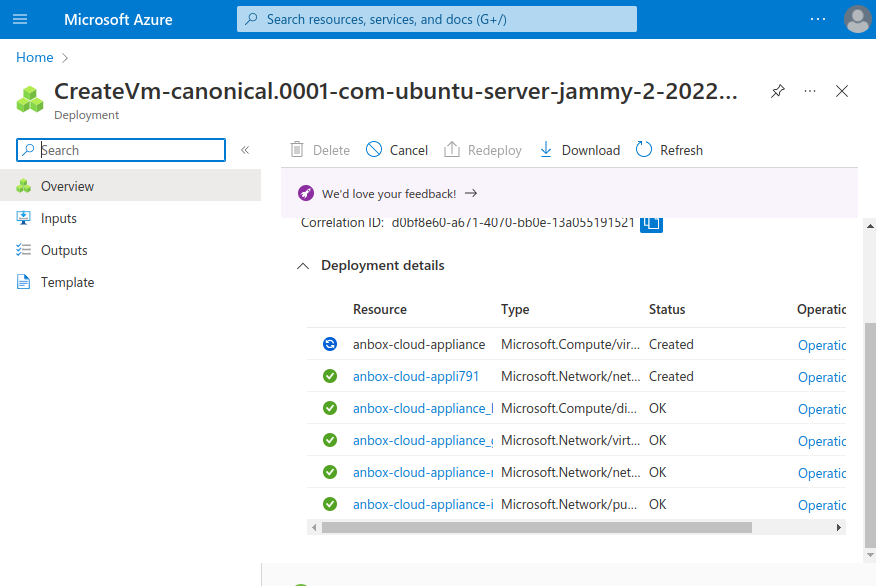
When deployment is complete, you can log on to the machine and install the Anbox Cloud Appliance.
Connect to the virtual machine using SSH
To install the Anbox Cloud Appliance, you must connect to the virtual machine that you just created, using SSH.
To do so, go to the resource page of your virtual machine and find its public IP address. Then use SSH to log on to the machine, using the user name ubuntu and the private key file that you downloaded during the creation of the virtual machine. For example:
ssh -i Downloads/anbox-cloud-appliance_key.pem ubuntu@192.0.2.15
Finish the installation
Perform the following steps to finish the appliance installation on the virtual machine. If you are not already familiar with how to perform these steps, see the tutorial on installing the appliance for detailed instructions.
- Install the Anbox Cloud Appliance on the virtual machine.
Remember to attach the virtual machine to your Ubuntu Pro subscription, while installing the appliance.
- Initialise the appliance.
- Register your Ubuntu SSO account with the appliance dashboard.
When you are done, you can log into the appliance dashboard using https://your-machine-address with your Ubuntu SSO account.