You can install the Anbox Cloud Appliance on AWS in one of two ways:
- Install through the AWS Marketplace. This is the recommended way, because this method simplifies the installation and deployment process and allows billing to be handled directly through AWS.
- Install the Anbox Cloud Appliance snap on an AWS machine. This method is not recommended, but if you want to do it anyway, see the Install the Anbox Cloud Appliance on a dedicated machine tutorial for instructions on how to install the snap.
The following instructions guide you through all relevant steps to deploy the Anbox Cloud Appliance from the AWS Marketplace. For additional information, see the AWS documentation about launching an instance.
The entire deployment process will take 10-15 minutes, depending on the selected hardware and the network conditions.
Before you start
Deploying the Anbox Cloud Appliance requires some familiarity with AWS. In particular, you should be familiar with:
- Amazon Elastic Compute Cloud (Amazon EC2), for basic EC2 configuration
- Amazon Elastic Block Storage (Amazon EBS), for configuring the EC2 instance storage
- Amazon Virtual Private Cloud (Amazon VPC), for configuring an internet facing subnet and a security group
The appliance uses the following billable services by AWS:
- EC2 and Marketplace appliance (see the AWS Marketplace product page for costs)
- Network egress (for example, see the Amazon EC2 On-Demand Pricing page for costs)
Choose an architecture
AWS supports running the Anbox Cloud Appliance both on AWS Graviton Arm-based instances and on x86 instances. Before installing the appliance, decide which architecture you want to use. The appliance supports the same set of features on both architectures, but you should factor in the following aspects:
- AWS Graviton (Arm) and x86 offer equal performance for Android applications.
- GPUs are available for both x86 and AWS Graviton (Arm).
Note:
To use GPUs with AWS Graviton (Arm), you must select a G5g instance. This instance type might not be available in all regions.
- Not all Android applications support the x86 ABI. Therefore, some applications can run only on Arm.
For detailed information about the offering, see the following pages on the AWS Marketplace:
Check the prerequisites
Check the hardware requirements for the Anbox Cloud Appliance here.
In addition, make sure you have the following accounts:
- An Ubuntu SSO account. If you don’t have one yet, create it here.
- An AWS account that you use to buy a subscription to the Anbox Cloud Appliance.
Note:
The quota for your AWS account must be sufficient for the instance types that you plan to use.
Install the appliance
Complete the following steps to subscribe to the Anbox Cloud Appliance offering, get access to the required instances and configure them correctly.
1. Start the launch wizard
Open the Amazon EC2 console and log in.
On the EC2 dashboard, click Launch Instance to start the Launch Instance Wizard.
2. Select the AMI
To select the Amazon Machine Image (AMI), type “Anbox Cloud” in the search field of the Application and OS Images section.
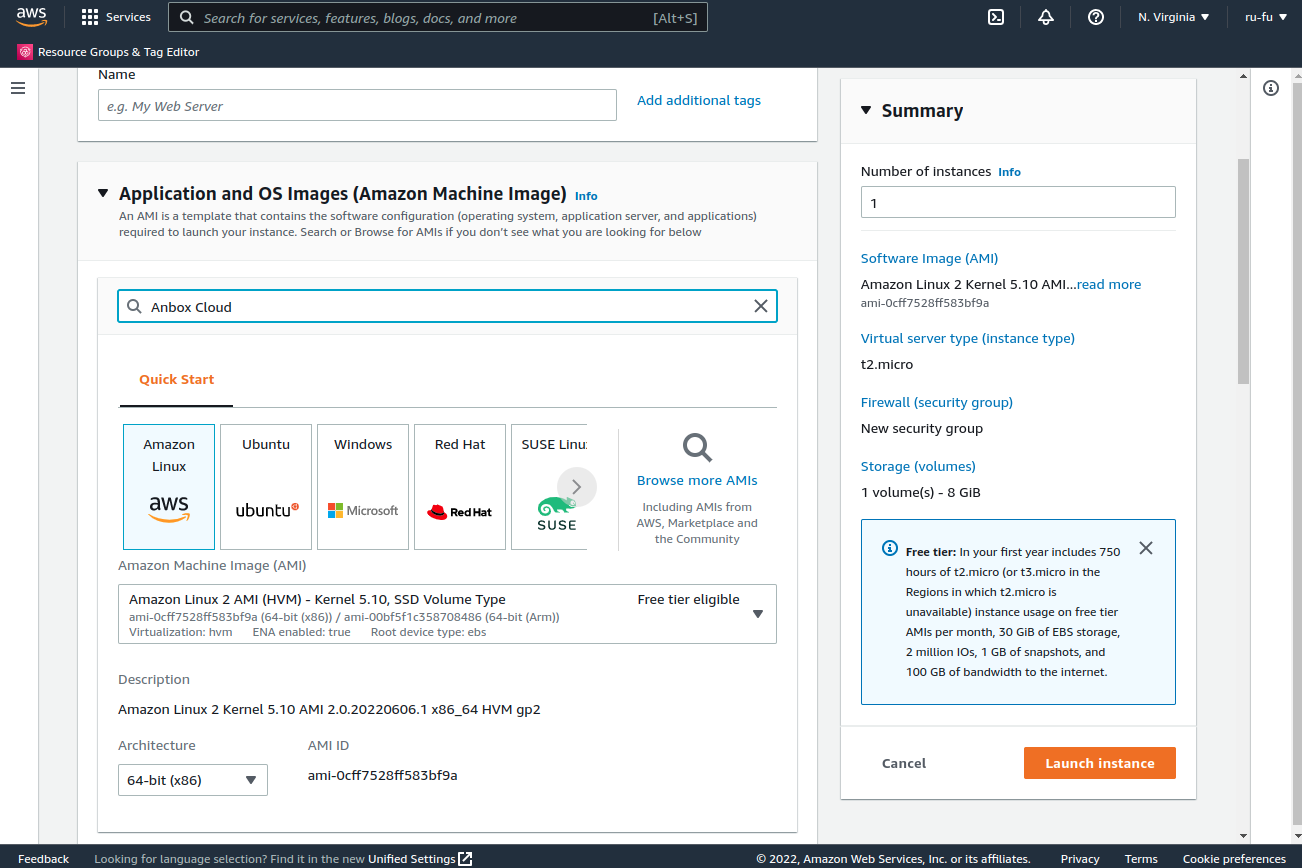
Choose either the Arm variant or the x86 variant and click Select.

You will be presented with the pricing information. Click Continue to confirm.
3. Choose an instance type
AWS offers various instance types. The Anbox Cloud Appliance images are supported for a subset of the available instance types only.
In the Instance type section, select the instance type that is most suitable for what you’re planning to do. For example, if you just want to try out the Anbox Cloud Appliance, an instance type with GPU support and limited CPU and memory is sufficient. See the Requirements for the minimum hardware requirements.
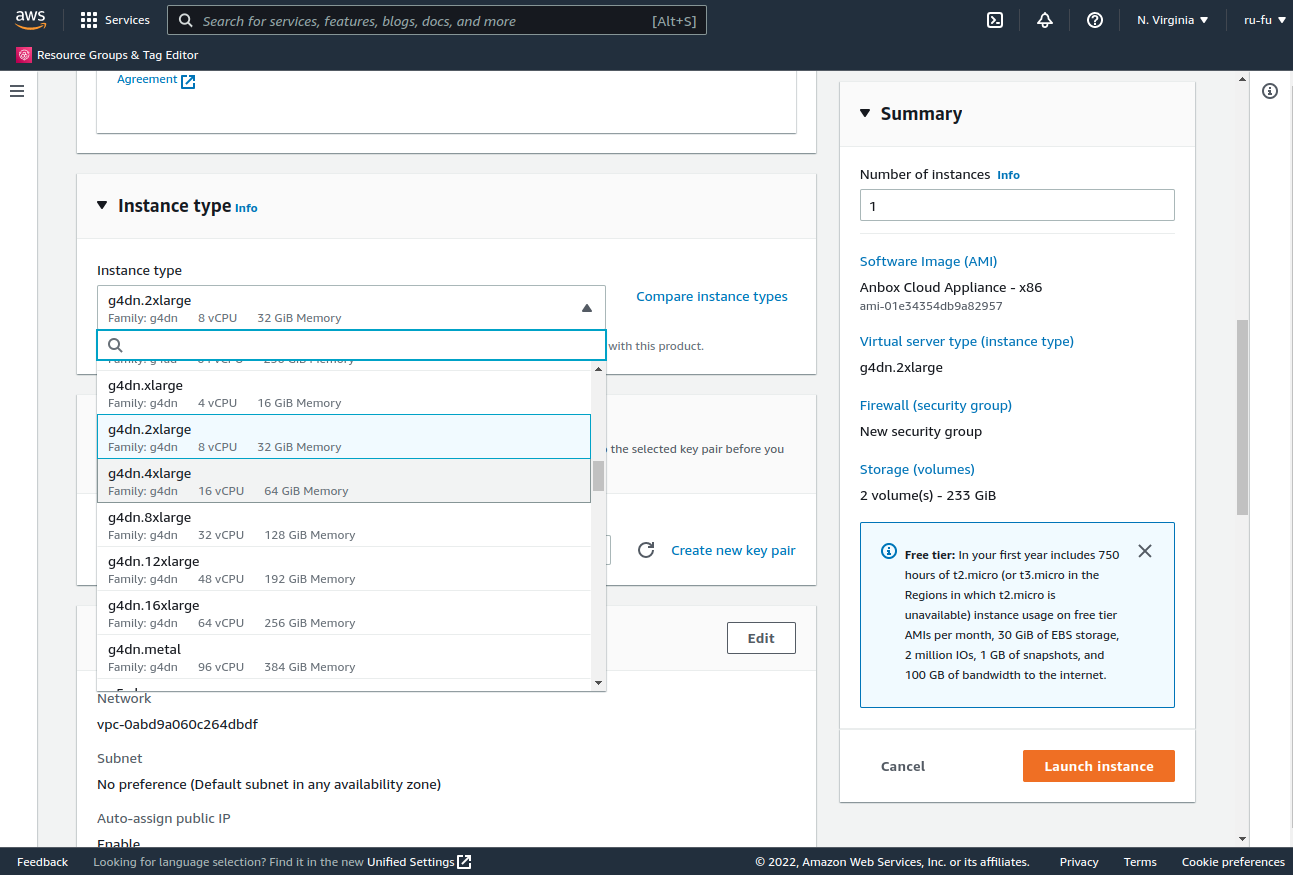
In this example, we picked g4dn.2xlarge, which provides 8 vCPUs, 32 GB of memory and a single NVIDIA Tesla T4 GPU.
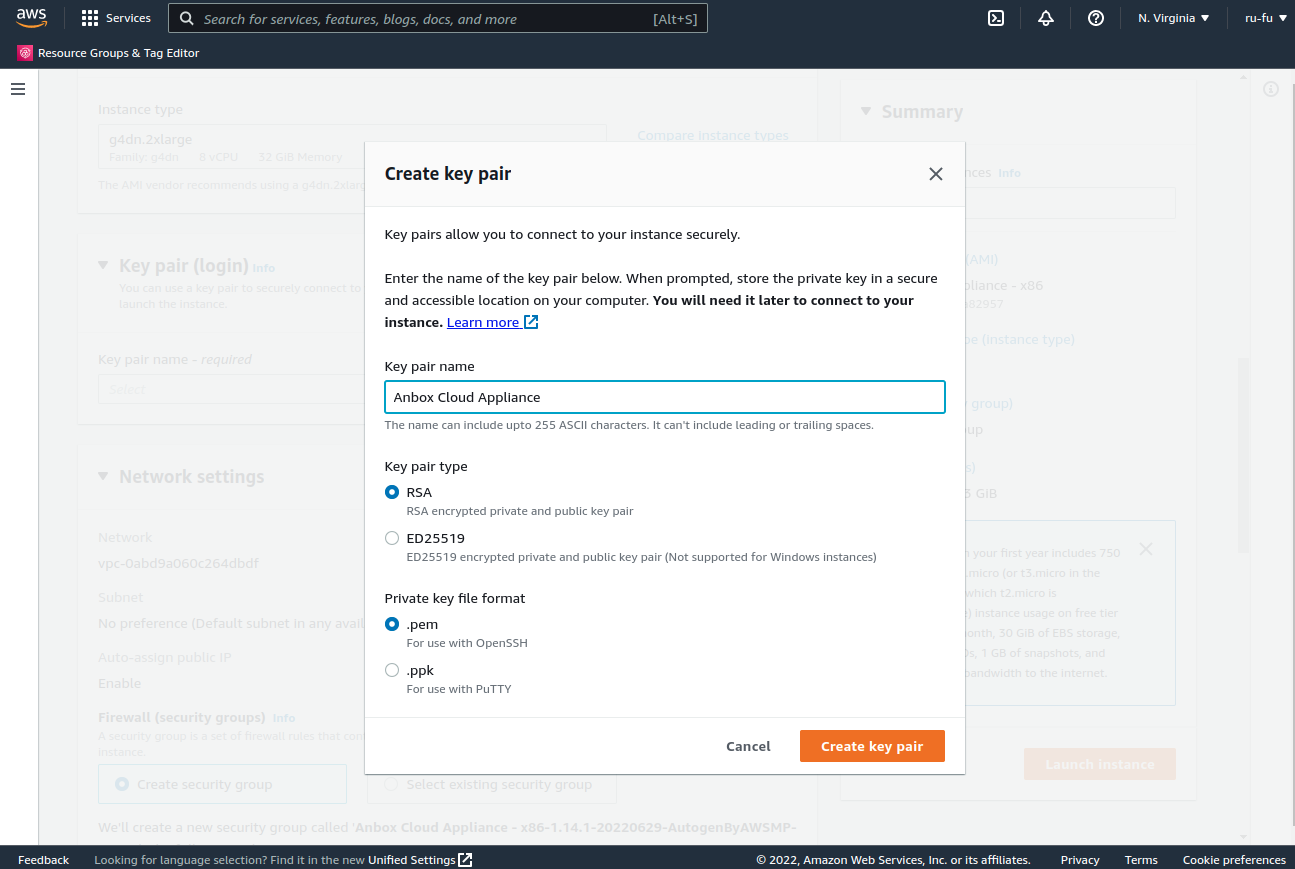
4. Select a key pair
In the Key pair (login) section, choose an existing key pair or create one if you don’t have one yet. Make sure to save the private key in a secure location.
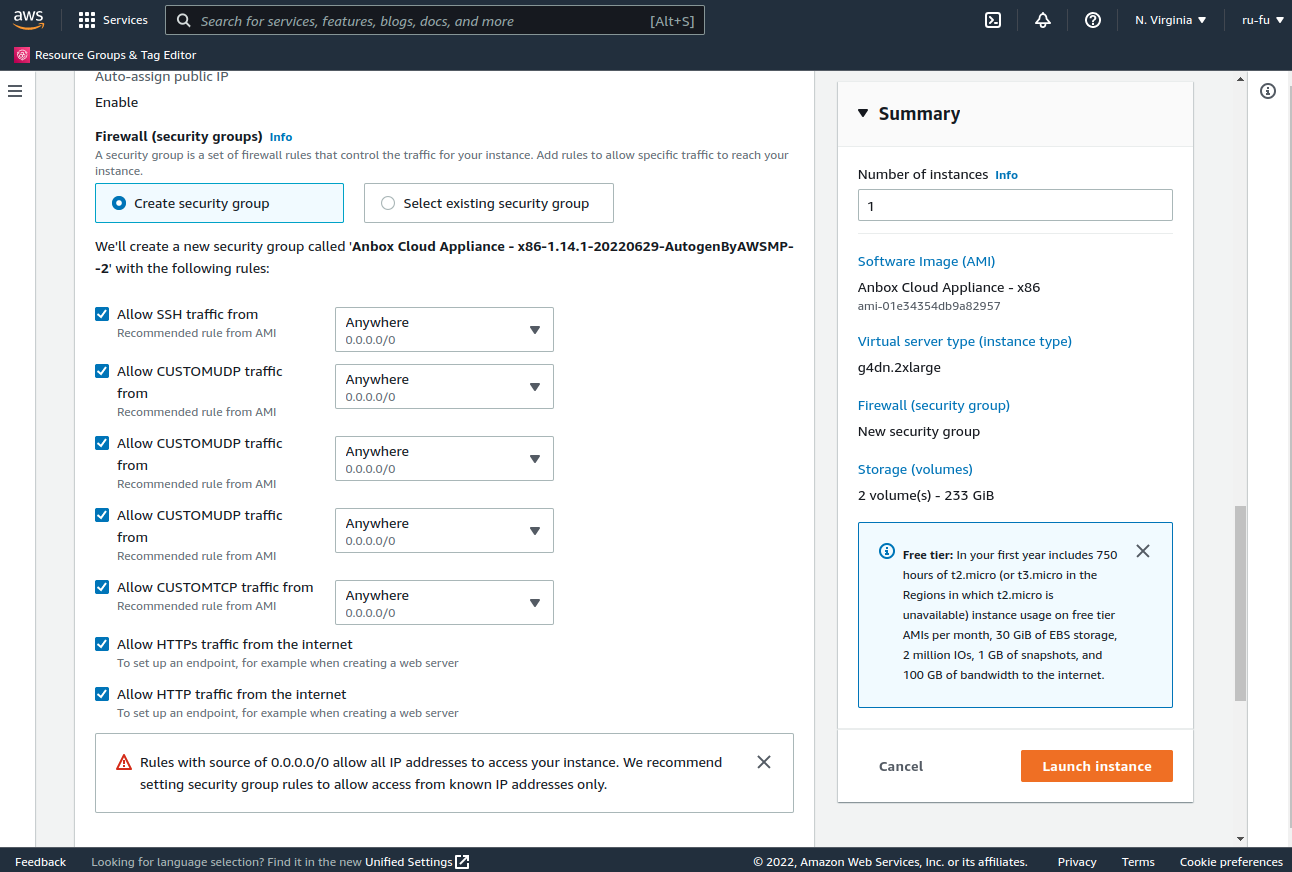
5. Configure the network
You do not need to customise any of the settings in the Network settings section, but you can fine-tune things. For example, you might want to put the instance onto a different VPC or subnet.
To allow external access, several ports in the security group attached to the AWS instance must be open. The AMI already comes with the required configuration, so you don’t need to do any changes. However, for security reasons, you might want to limit access to specific source IPs or subnets.
For reference, all required ports are documented here.
6. Add storage
The instance requires sufficient storage to work correctly. For optimal performance, we recommend the following setup:
- A root disk with a minimum of 50 GB (required)
- An additional EBS volume of at least 50 GB (strongly recommended)
Anbox Cloud uses the additional volume exclusively to store all of its data, including its instances. Using a separate volume isolates it from the operating system, which increases performance. If no additional EBS volume is added, the Anbox Cloud Appliance automatically creates an image on the root disk, which is used to store any data. However, this is not recommended.
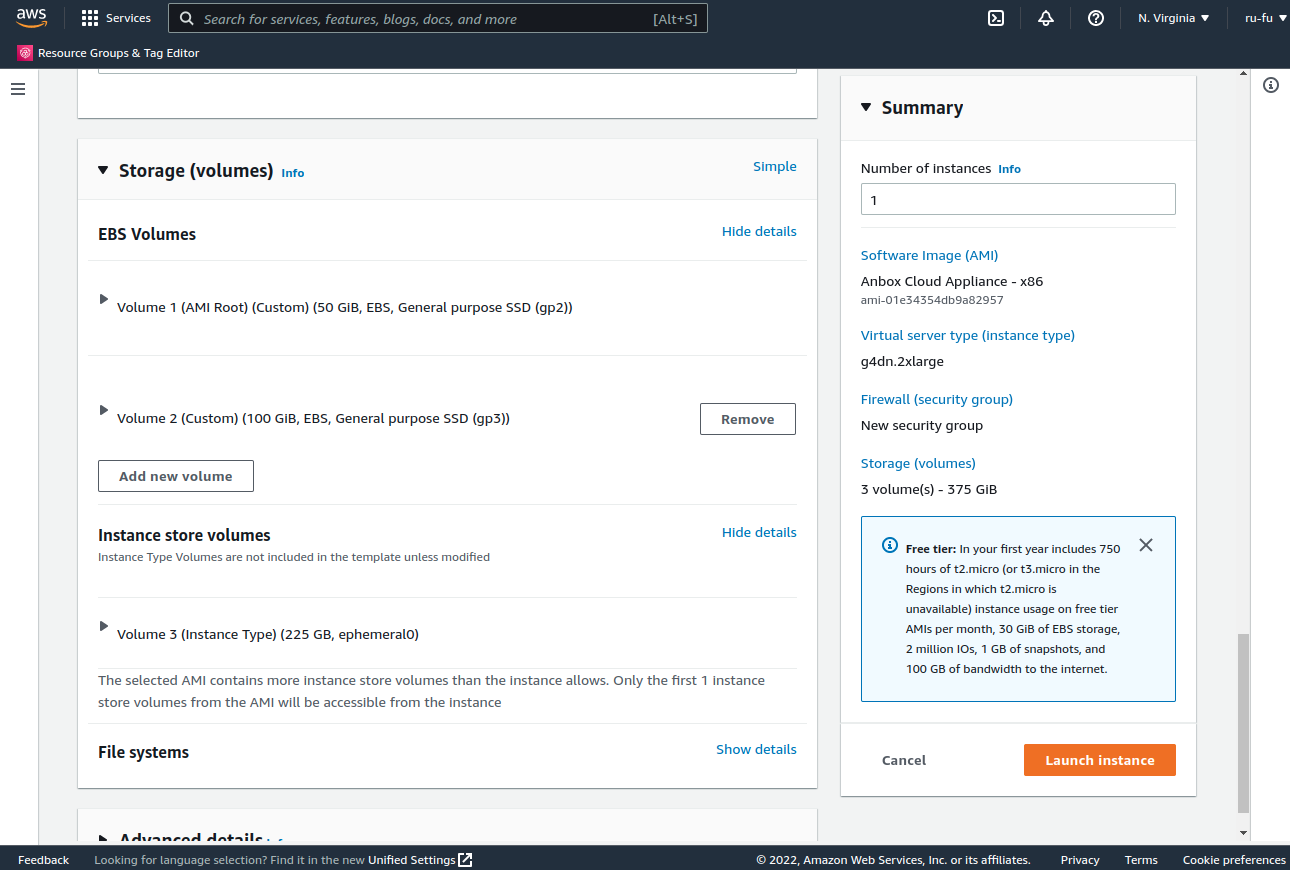
In this example, we use three storage volumes:
- Volume 1 at
/dev/sda1as root disk with a size of 50 GB - Volume 2 at
/dev/sdbas EBS volume with a size of 100 GB - Volume 3, an ephemeral disk at
/dev/nvme0n1, which is part of theg4dninstance and which is ignored by the Anbox Cloud Appliance
If you don’t have any specific requirements, we recommend choosing the same configuration.
7. Review and launch
You should now review the instance summary. If everything is correct, click Launch instance.
AWS will verify your configuration, subscribe you to the product and launch the instance.
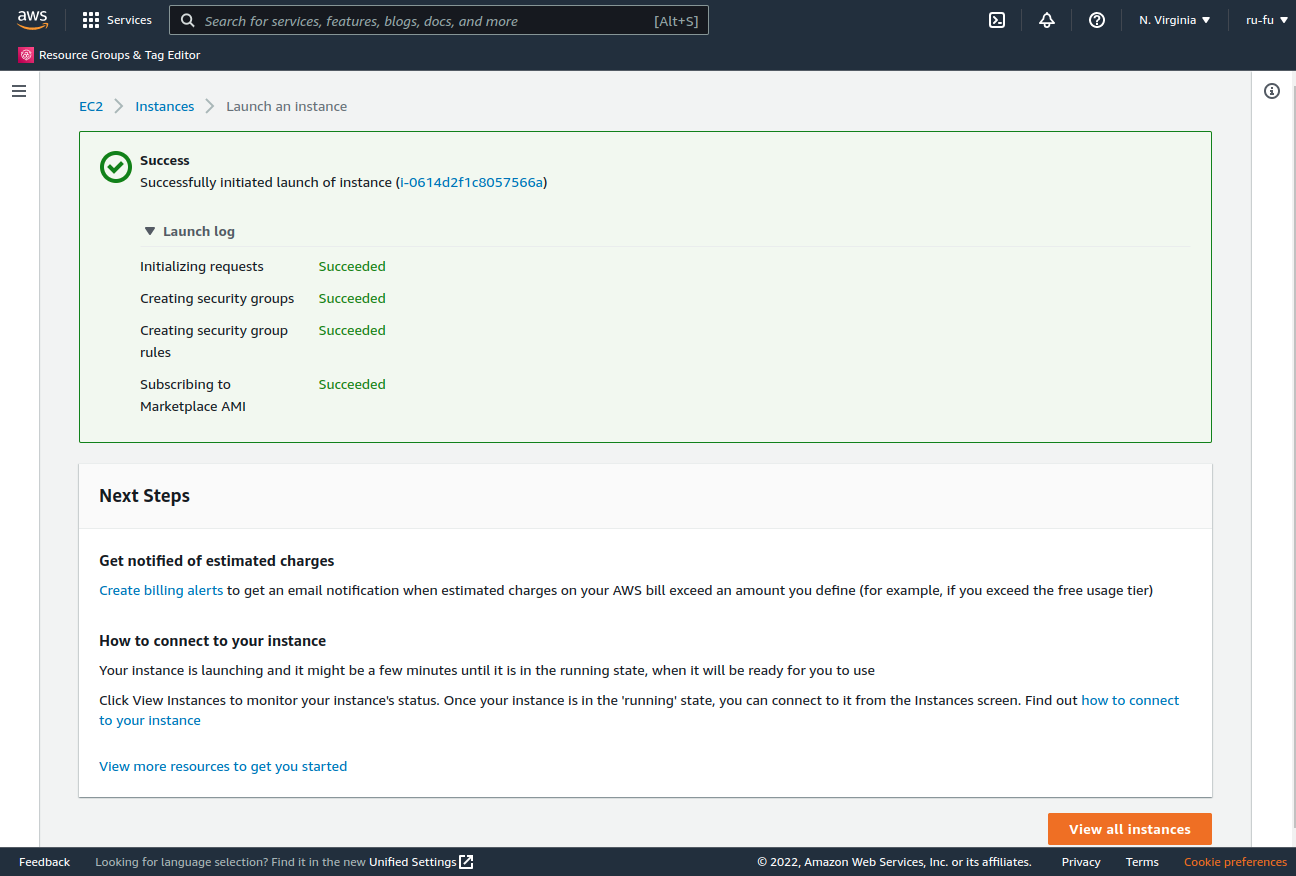
Access the appliance
When the instance is successfully launched, you can find its public IP address in the instance details page. Use this IP address or the corresponding DNS name to access the status web page.
By default, the Anbox Cloud Appliance uses self-signed certificates, which might cause a security warning in your browser. Use the mechanism provided by your browser to proceed to the web page.
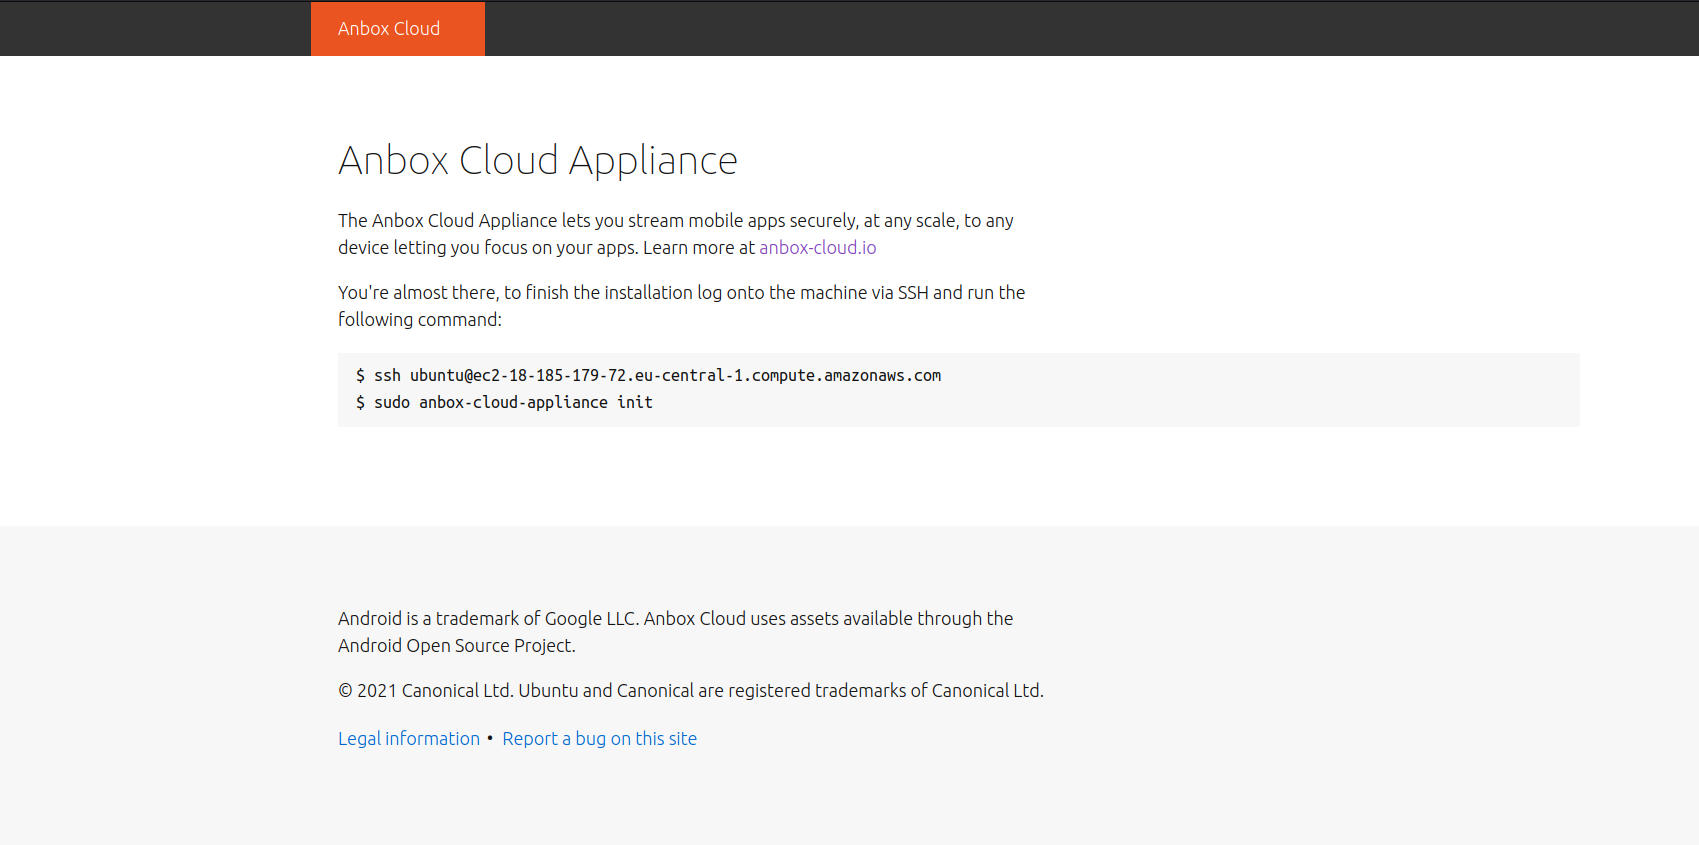
Connect to the virtual machine using SSH
Connect to the virtual machine hosting the appliance using SSH. To do so, use the user name ubuntu and provide the path to your private key file. See Connect to your Linux instance using SSH for instructions on how to connect.
Finish the installation
Perform the following steps to finish the appliance installation on the virtual machine. If you are not already familiar with how to perform these steps, see the tutorial on installing the appliance for detailed instructions.
- Initialise the appliance
- Register your Ubuntu SSO account with the appliance dashboard
When you are done, you can log into the appliance dashboard using https://your-machine-address with your Ubuntu SSO account.